This design is hundreds, maybe thousands of years old.
It is quite efficient and once you establish a rhythm it is less tiring than you would expect. It is valved so that
you get airflow on the push and the pull stroke. Kind of like circular breathing. This is the design sword smiths
use for all of their work, including welding during folding. It will supply enough air to heat large cross sections
of metal.
The key is to make everything slide smoothly so that
you do not have to overcome friction as well as air pressure.
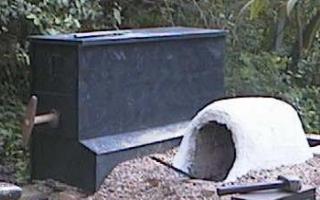
The one shown in the pictures is my portable box.
It is not as well made as the one I had in my shop previously. But it will give you the idea. The other
one is in storage and very heavy. I made it out of 3/4" lumber core plywood. I just about need help to move it.
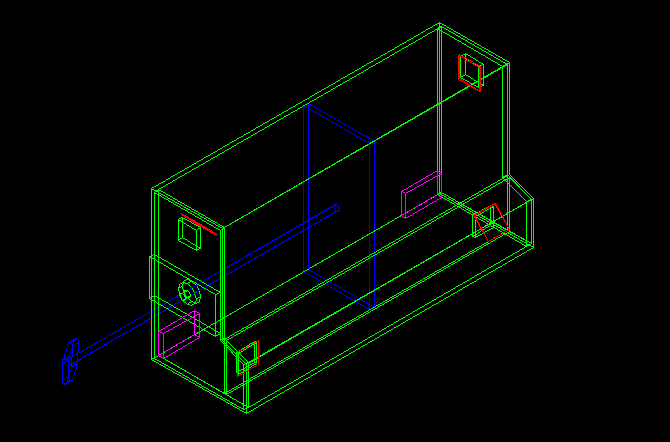
Here is a 3-D view. It shows you all the elements.
The piston, shaft and handle are blue. The flap valves are red and the stop blocks are magenta. The box itself
is in green.

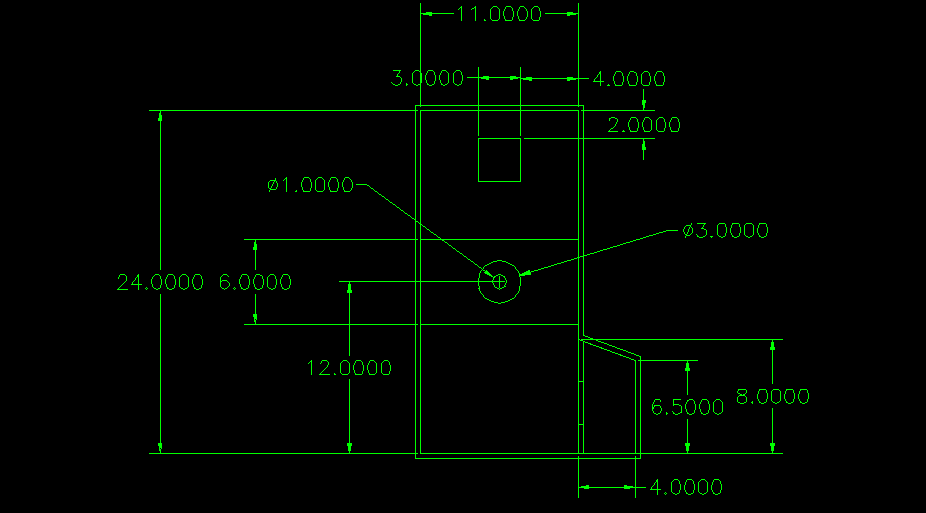
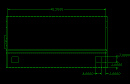
An end view with dimensions

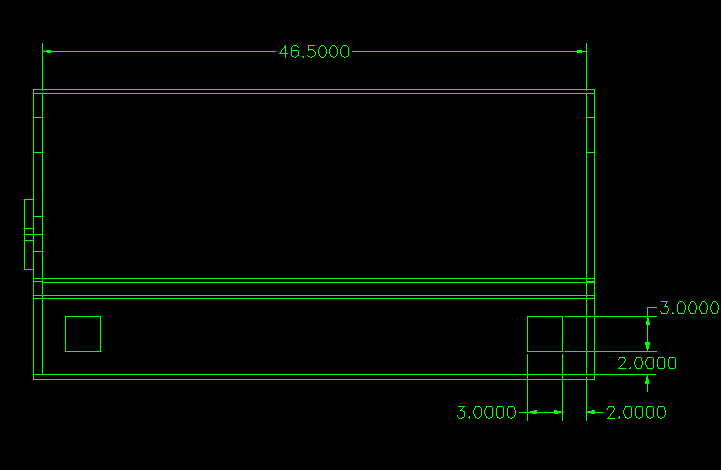
A side view with dimensions
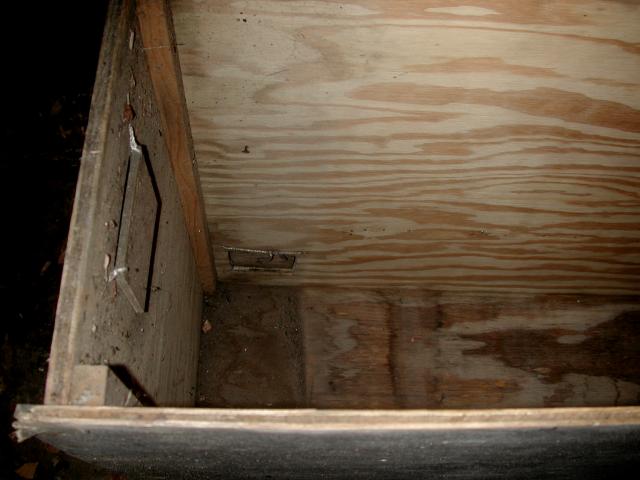
An end view of the actual box.

This view show some
important elements.
1) The flap
is simply tied with cord at the corners and the cord run through holes in the end and tied off.
2) There is
a 3" diameter hole in the box itself and then a smaller gasketed hole in the outside block. This is so at assembly you
can adjust the outside block to the right height. You want the shaft to travel in a straight line and not bind as it
slides in and out.
3) There is
a stop block to keep the piston from hitting the valve. In the drawing I show it set at the bottom but halfway up the
side is better.
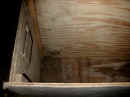
The valve can just
be seen in the lower left
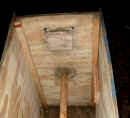
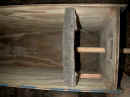
Another shot on the
other end showing both the upper and lower flap valve
A top view showing the stop block and the piston covered
with a cheap bath mat.
So how could this
be better.
1) Cut a piece
of glass to sit in the bottom of the box for the piston to slide on.
2) Put Formica
on the sides and top to help the piston slide.
3) Use something really
slick to gasket the piston and the shaft. The Japanese use raccoon fur.
The only tricky part
is sizing the piston so that when you put the wrap on it seals as it slides but is not too tight.
All you need to do
now is cut a hole, insert the 2" pipe and seal it with furnace cement or even clay will work. The forge building pictures
show this hole clearly.