Making charcoal is surprisingly easy. But it
is not something you want to do in your backyard except in small quantities. The method I describe here is what is known
as the retort or indirect method. Basically, wood is placed in a container and cooked. All the volatile gases
are driven off and charcoal remains. This is exactly the method used be the wood chemical industry before petrochemicals
superceded it. We, however are going to use these volatile gases as fuel for the charcoal making fire. Almost
like pulling yourself of by your bootstraps but not quite.
The concept is simple. Start a fire under the
container. Begin driving off the gases. Route these gases back under the container. Ignite the gases
with the fire already burning under the container. Use these gases to drive of more gas and ignite without adding any
other fuel to the fire. When the gas is all driven off the fire dies. Let everything cool off, open the container and
you have charcoal.
I use pine charcoal. It burns hot and clean with
virtually no ash. It also burns fast. I burn up a lot of charcoal when I am forging. I have tried hardwood
charcoal in my forge but it seems to burn down to a lot of ash and small pieces restricting the air flow. I also have
a hard time getting it to welding heat. Small blades such as knives were fine, but I could not seem to generate the
heat I needed for the large hunks of steel I forge and weld.
I get my raw material from construction sites.
I have never had anybody tell me no when I ask to pick up their cutoff scrap. For me this is ideal raw material.
It is scrap that would go in a land fill. It is already the right size for efficient cooking and it has already been
dried. This is important. If you use green wood you will use a lot of energy just driving off the water.
This is the only material I have ever used. If you use something else you are breaking new ground and will have to experiment
with the info I give you here. One caveat here. Never use pressure treated wood. One of the ingredients is arsenic.
You do not what to burn it and release the vapors for you or anyone else to breathe. If you are not sure whether piece
of wood is pressure treated leave it. The same goes for ply wood, the glues and binders can be nasty stuff.
The method I use requires 55 gallon barrels.
Once you get the idea I am sure you can modify this method to suite your needs.
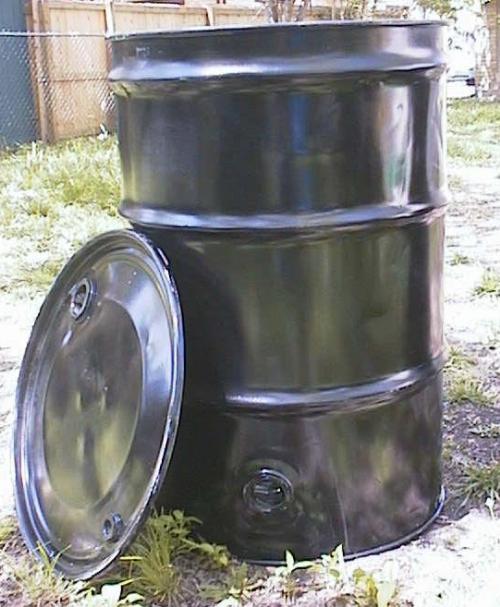
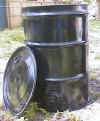
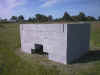
The first thing you need is a barrel or barrels depending
on how big you want to go. Pictured below is the type barrel you need. Pay attention here.
This barrel has a removable lid and bung hole in
the bottom. Both features are important. Without the removable lid you cannot load your wood, reseal it and then
open it to get your charcoal out. Throw away the rubber seal that comes with it. You will just melt it and make a big
mess if you try to use it. The bung hole in the bottom makes it easy to get the gases out. This hole accepts 2" threaded
iron pipe. Most towns have a company that recycles barrels. These cost me $25 each.
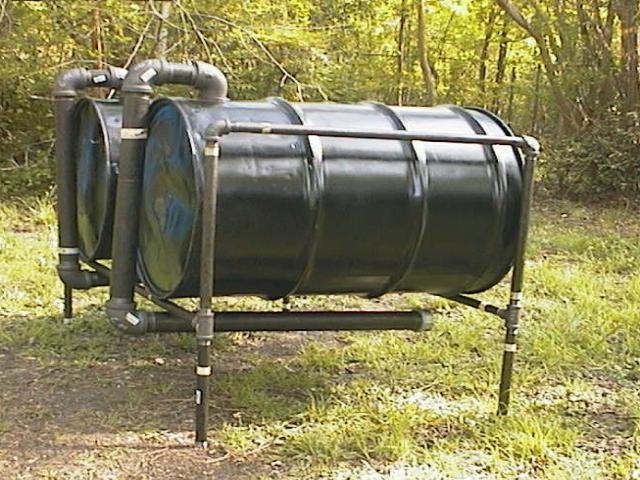
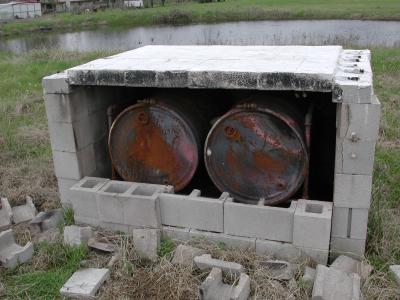
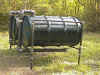
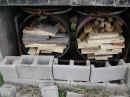
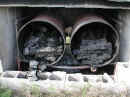
The picture below shows the arrangement of the barrels.
I used 1" threaded pipe to make the stand but anything will work that will take the heat.
The 2" pipe for each barrel consists of 1-male/female
elbow that screws into the barrel. 2-female/female elbows. 1-6" pipe, 1-24" pipe, 1-36" pipe and 1-end cap. I
was lucky. My local hardware store had these sizes already made up. I drilled 1/2" holes every 6" down each side of the 36"
pipe that goes under the barrel. When I screwed it in I made sure the holes were pointing left and right
so that the flames would be directed around both sides of the barrel. That's it . Now you are ready to enclose it.
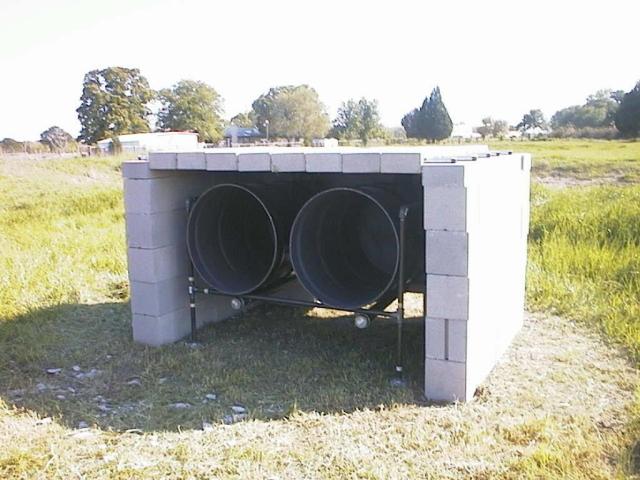
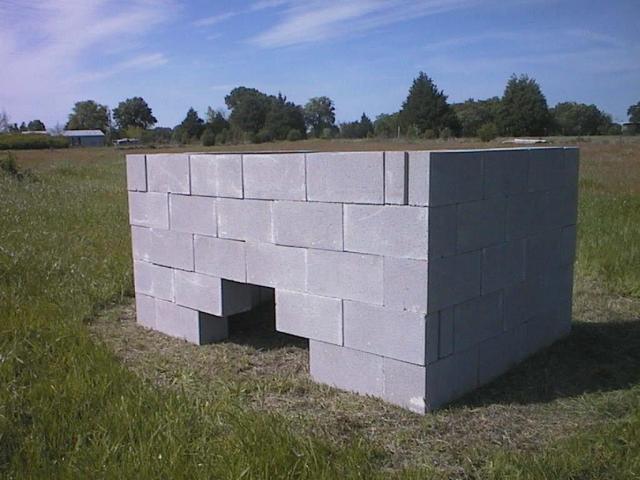
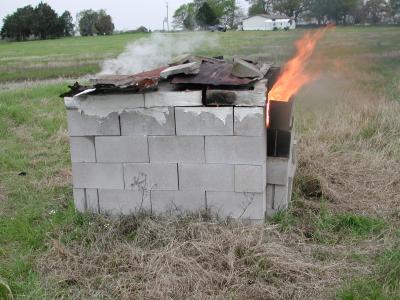
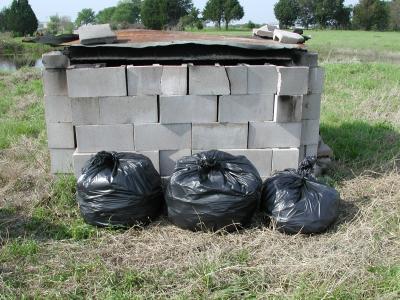
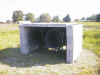
This might would work if you did not enclose it but
you would have to use a lot more fuel. I just used concrete blocks dry stacked. They are not ideal. Some
of them cracked from the heat. But it still works pretty good. Once the barrels are loaded, I just stack more
blocks in the front. I use 4" solid blocks for the last row in order to create a gap for smoke to escape and create
a good air flow to fuel the fire.
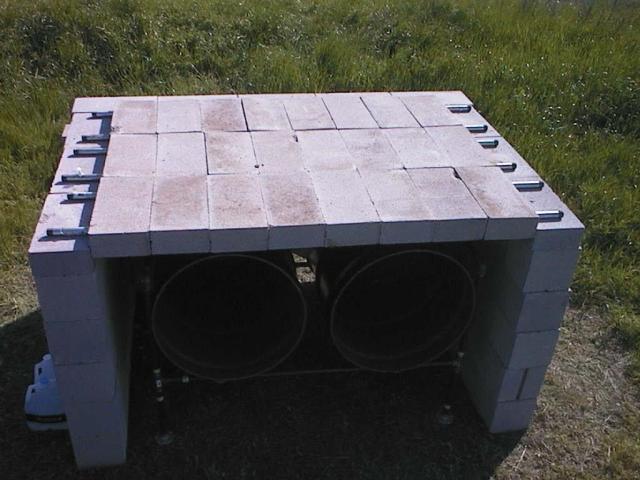
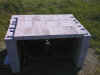
I used hollow 4" blocks for the top. Slide
them over 1" iron pipe for support. 2 pipes for each row of blocks. You might have to chip out some concrete in the cavities
to get the pipe through.
Create a hole in the back of the kiln in order to
add fuel to the fire and allow air in for combustion. I did this one with some creative stacking.
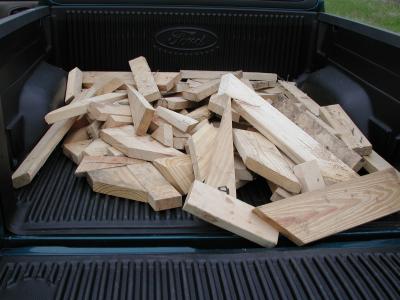
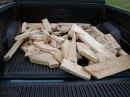
Here is the raw material. This is enough for one
barrel. For a two barrel burn, you need about three barrels worth of scrap. Two to make charcoal out of, one for
fuel.
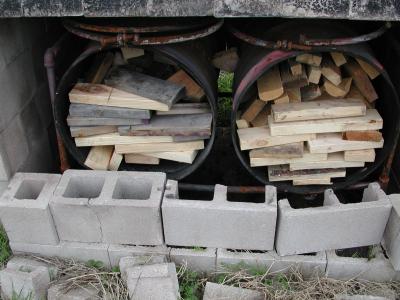
Now you are ready to make some charcoal. Load
the barrel(s) with the short stuff. Around 12" or less. Use the longer pieces for fuel. Don't pack the wood
into the barrel. There needs to be some space for the gas to escape the wood. If you are too neat about how you
put the wood in, it is like trying to char one big piece of wood.
Put the wood in, clamp the lid on and stack the blocks
in front of the opening.

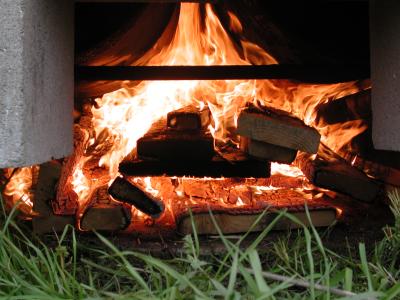
Go around to the back and stack wood under the barrels,
a lot of it. You want to make a whopping hot fire. Get the fire going and keep it going good and hot. A
single barrel will take about 20-30 minutes to start producing gas. Twin barrels about 45.

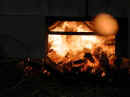
The gasses will start slowly and you will see flames
just licking out of the holes drilled in the bottom pipe. In about 5 or 10 minutes it will be like a pressurized gas
valve was turned on. Flames will shoot out the holes, hit the side walls travel up and around the barrels and possibly
shoot out the top gap accompanied by a loud roaring sound. Hardwood may not be as dramatic but pine really puts on a
show.
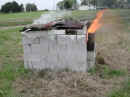
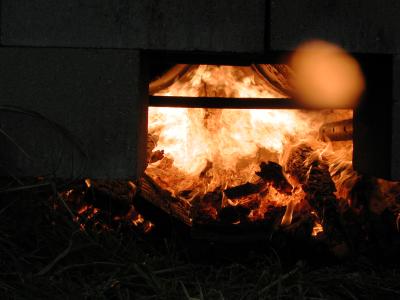
Once the gases ignite, you don't need to add any more fuel.
In fact you probably won't want to go near it. During the first part of the burn there will be a lot of smoke, some
of it quite black. Once it really gets going though, there will just be an incredible amount of heat. Let it burn until
the fire dies on its own, about 2 hours. This means all the gases have been driven off. It is best to let it cool
down overnight. Opening it too soon and allowing air in can ignite the hot charcoal.
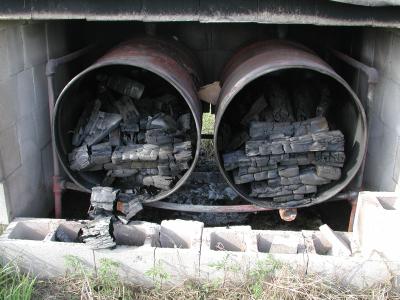
The next day open it up and shovel out your charcoal.
Wear a respirator, there will be a lot of fine charcoal dust in the air as you shovel it.
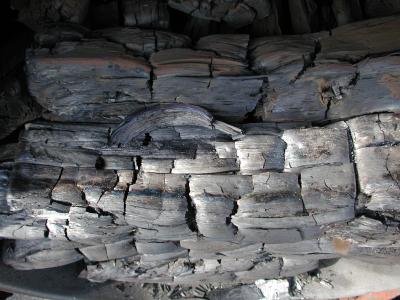
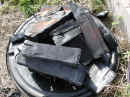
Here is the charcoal just after opening the lids.
You can get some idea of the volume loss by comparing to the picture before the burn. Not to bad. Much less than the
direct method. But we had to burn nearly a barrels worth of wood for fuel. So in the end it may all even out.
You can't get something for nothing

Here is a close up of the wood in the front part of the barrel.
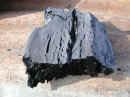
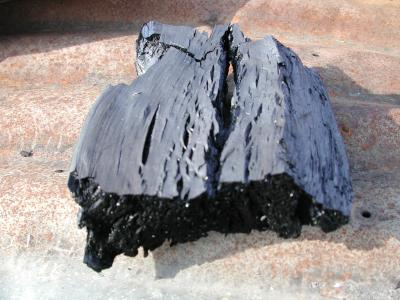
Here is a close up of an individual piece. it is charred all the way through.
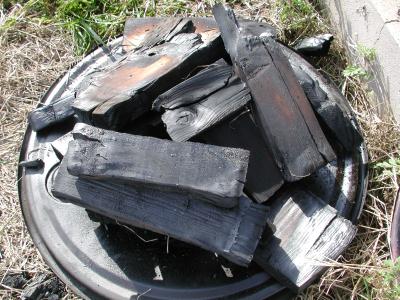
Here This is all the wood that did not char all the way through. This is fairly
typical amount for a burn.
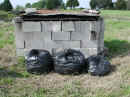
Here is the yield. Two and a half 32 gallon trash bags
Making charcoal can be time consuming but it is not hard and it is fun. There
is something satisfying about loading scrap wood in a barrel, applying fire then removing a different substance from the barrel.
Makes you feel like the alchemist of old.